Our Objectives
– Signup with a cryptocurrency payment gateway provider
– Install a WordPress WooCommerce compatible payment gateway plugin
– Configure gateway and plugin to communicate and accept payments
Things You Will Need
– WordPress website
– WordPress eCommerce plugin WooCommerce installed and configured
(Please let me know in the comments if there is demand for a basic tutorial to set these up)
Lets allow people to buy from your existing online shop with bitcoin or another cryptocurrency also known as “alt coins”, short for alternative coins.
We are going to use an existing WordPress install that has the WooCommerce plugin installed and we will add another plugin that will allow us to offer and accept cryptocurrency as another payment option. This cryptocurrency payment gateway plugin will require us to have an account with the payment gateway provider.
This post requires that you know your way around the WordPress Admin panel and can install and activate plugins and change settings. If you need help or more detailed information, please let me know in the comments.
This tutorial only shows you how to accept payment with a cryptocurrency. So if your online store is already in USD, that is the only price customers will see. The customer will not know how much they have to pay in cryptocurrency until they checkout and go to the gateway provider. This is because the prices are live and constantly adjusting, so to use the most accurate exchange rate, the cryptocurrency price is calculated and displayed at the last moment.
There is a plugin that will allow you to show live estimates, but it will require some theme modification and a dedicated tutorial.
Cryptocurrency Payment Gateway Provider
 There are a number of good options out there and choosing one for your needs can take some time.
We are going to use CoinPayments.net as I have experience with them and they support a wide range of alt coins.
The registration process is fairly simple with little information needed to get started. Please make sure to use an email address you have easy access to. The login process is 2 steps, where an email is sent with a code you need to enter before you can login. This is extra security where a hacker would need control of your email account before they could get access to your merchant account to move funds.
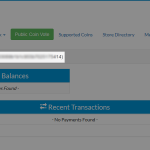
After you have registered and logged in, you will see your Merchant ID at the top of the page. Or you can go to My Account > Account Settings and copy your Merchant ID which looks like a random alpha-numeric string. The Merchant ID will be used inside the WordPress plugin settings.
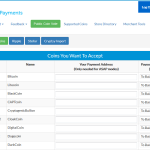
Before you leave the CoinPayments dashboard, go to My Account > Coin Acceptance Settings and select the coins you would like to accept. CoinPayments can hold funds for you, or you can have them automatically sent to your own wallet address which is a nice feature.
Installing The Payment Gateway Plugin
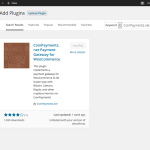
Inside your Wordpess Admin go to Plugins > Add New and Search for “CoinPayments.net Payment Gateway for WooCommerce“.
Install and Activate the plugin.
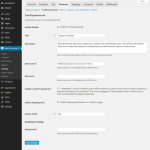
Now we need to enter the plugin settings in WordPress Admin > WooCommerce > Settings > Checkout > CoinPayments.net
– Enable CoinPayments.net as a Checkout option by checking the box
– Enter the “Title” users will see for this payment option during checkout
– Enter a short “Description” to explain to your users what this payment option is
– Enter the “Merchant ID” we were issued when signing up at CoinPayments.net
– The “IPN Secret” is not required for this tutorial
– “Enable 0-confirm payments” is an advanced option
– The “Collect Shipping Info” option is one that will be dependent on your requirements
– The “Invoice Prefix” option is at your discretion
– For “Debug Email” I recommend an email address you can monitor easily
Once you have entered the settings press “Save changes” at the bottom of the page. The plugin is now live so we should check what our customers are seeing.
The Customer Experience
We are now going to look at what the customer will experience on your eCommerce website. For the most part, everything will be the same before you added this plugin, but during checkout they will have the option to pay with bitcoin or any other cryptocurrency you choose to accept.
I would recommend going through the process on your live site, all the way through to receiving the payment address that CoinPayments will provide. It will create an order in the system, but if it is not paid in 2 hours and 30mins it will be automatically removed from CoinPayments.
– The product item page is as it was before we added the new cryptocurrency payment gateway
– When confirming you order at checkout you can choose the new payment option we added with the plugin, we have also added a small description that was set in the plugins settings. After pressing the button “Place order” you will be sent to the CoinPayments.net website
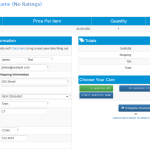
– On the CoinPayments website we have chosen to collect the shipping information again, but this is also where you “Choose Your Coin” to pay with
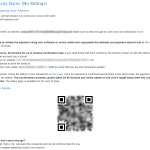
– The last page is the CoinPayments actual payment page. You will be provided with a payment address and QR-code for your chosen cryptocurrency
Summary
I hope this has provided a good overview of how quickly you can add the ability to accept cryptocurrency on your existing WordPress WooCommerce site. There is a lot of detail that can be gone into, and everyone is going to have slightly different needs. Overall though, there are not a lot of requirements to use CoinPayments.net and they will even push any funds you earn straight to a wallet you control.
What’s next?! If you have a product to sell, setup a WordPress website with WooCommerce and signup to CoinPayments. Please ask any questions in the comments, it will help guide which areas I need to provide more detail on.
All Done!


